The story and science behind the dish · recipe above ↑
Cast-Iron Kimchi Fried Rice with Crispy Nurungji: Fermented Kimchi, Scorched Rice Science, and Home Method
Why does cast iron turn kimchi fried rice into a two-texture meal?
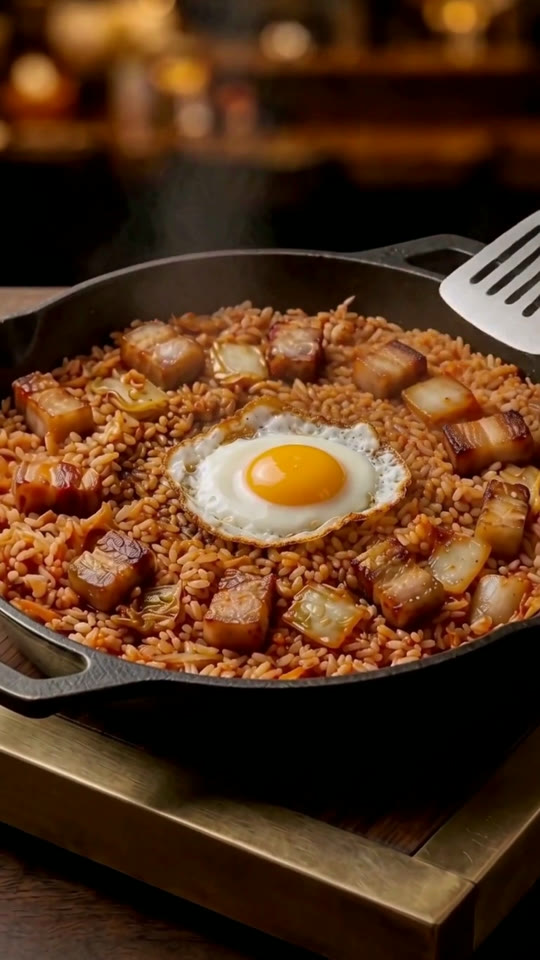
Cast-Iron Kimchi Fried Rice with Crispy Nurungji builds two contrasting textures inside one 12-inch seasoned cast-iron skillet. Loose, glossy short-grain rice stained red with pork fat, aged kimchi brine, and buttered gochujang sits on top, while the bottom layer presses flat against hot iron until it fuses into a crackling golden nurungji crust.
Most home versions of kimchi bokkeumbap stop right after the stir-fry toss. Stopping there leaves you with soft grains from top to bottom. Letting the rice sit undisturbed over medium-low heat for three to four minutes after tossing replicates the scorched rice floor of a Korean stone pot (dolsot) without needing specialty stoneware. When you crack the sunny-side egg yolk on top, rich liquid yolk coats the spicy rice above while the toasted slab underneath stays audibly crisp.
How did kimchi bokkeumbap and nurungji grow out of Korean home kitchens?
In Korean households, kimchi never keeps a static flavor. Freshly salted napa cabbage (baechu-kimchi) tastes crisp and bright during its first week, then lactic acid bacteria (Leuconostoc and Lactobacillus species) steadily convert cabbage sugars into lactic acid, dropping the brine pH toward 4.0 over several weeks in the refrigerator. Once a jar turns too sour and punchy to eat cold as a side dish (banchan), cooks chop those mature leaves for hot skillet dishes and stews.
Nurungji carries an equally practical history. For centuries, cooking short-grain rice in heavy iron cauldrons (gamasot) over wood fire naturally left a thin, golden toasted rice sheet stuck to the kettle floor. Cooks prized that nutty scorched layer as a snack or poured hot water over it to brew sung늉 (sungnyung), a warm toasted-rice tea served after meals. Pressing seasoned kimchi rice into heavy cast-iron cookware brings both traditions together in fifteen minutes on a modern stove, a pairing popularized in home guides such as My Korean Kitchen's Kimchi Fried Rice.
Why do aged kimchi, chilled day-old rice, and pork belly fat work together?
Three physical ingredients control whether kimchi fried rice fries clean or steams into mush:
- Starch retrogradation in chilled short-grain rice: Freshly steamed short-grain Japonica rice holds surface moisture and sticky amylopectin gel. Overnight refrigeration triggers starch retrogradation, realigning starch molecules into firmer crystalline structures so cold 450 g portions separate cleanly in hot fat instead of clumping.
- Pork belly fat buffering sour lactic acid: Well-fermented kimchi brings sharp acidity that wakes up heavy carbs, yet raw sour cabbage tastes harsh on its own. Rendering 120 g of thick-cut pork belly (samgyeopsal) first coats the skillet in savory pork fat. Frying the chopped kimchi for three to four minutes in that rendered fat drives off raw moisture and caramelizes cabbage sugars.
- Gochujang, brine, and butter emulsion: Fermented gochujang contains glutinous rice starch and natural sugars that burn quickly on bare dry iron. Dissolving 1.5 tablespoons of gochujang with 60 ml of aged kimchi brine and 15 g of unsalted butter creates a glossy red glaze that coats every grain before the final press.
| Skillet Stage | Key Component | Quantity | Thermal & Textural Function |
|---|---|---|---|
| Fat rendering | Thick-cut pork belly (1 cm pieces) | 120 g | Coats seasoned iron in savory fat and adds crisp meaty bites |
| Acid caramelization | Well-fermented napa cabbage kimchi | 200 g | Drops excess water and mellows sharp lactic acidity in hot fat |
| Starch separation | Chilled day-old cooked short-grain rice | 450 g | Retrograded grains absorb red seasoning without turning pasty |
| Glossy red glaze | Gochujang, aged kimchi brine & unsalted butter | 1.5 tbsp + 60 ml + 15 g | Stains rice deep red while butter promotes even crust browning |
| Bottom sear | Toasted sesame oil & soy sauce | 1 tbsp + 1 tsp | Feeds nutty aroma and amino acids into the pressed nurungji floor |
| Service crown | Sunny-side eggs, nori strips, scallions & sesame | 2 large + 2 tbsp | Runny yolk richness against dry roasted seaweed and crisp rice |
Why use a Nakiri blade, Korean BBQ shears, and heavy cast iron?
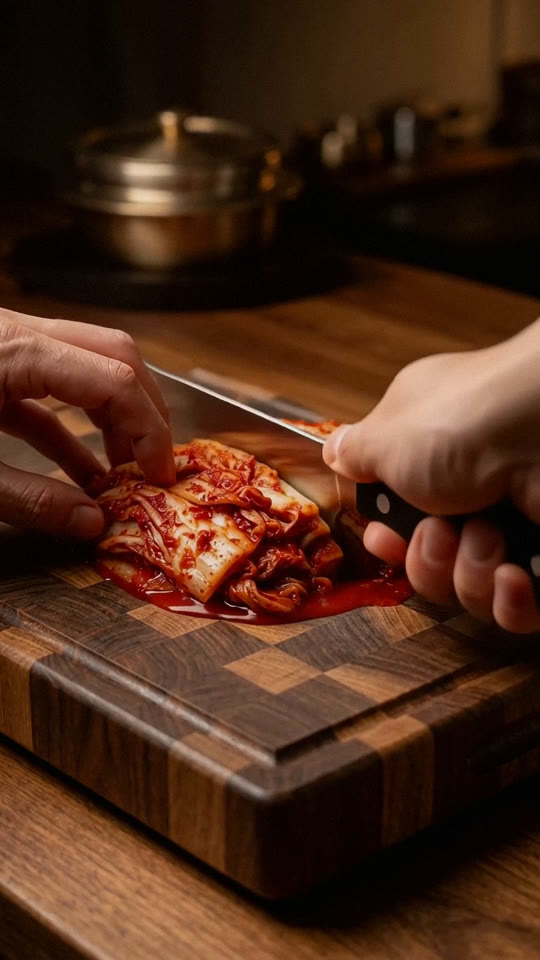
Tool geometry speeds up prep and protects texture at high heat. Chopping wet fermented napa cabbage with a curved Western rocker often leaves thin fibers connected at the bottom of the stroke. A 7-inch squared-nose Nakiri vegetable cleaver drops straight down at 90 degrees so the entire flat edge meets the walnut butcher block at once, cutting uniform bite-sized squares without bruising the leaves.
Over at the stove, forged micro-serrated kitchen shears (gawi) borrow a staple Korean BBQ table habit. Snipping browned pork belly strips directly over the skillet keeps rendered meat juices inside the pan rather than smeared across a second cutting board, and a quick wipe lets the same shears snip crisp roasted nori ribbons over the finished egg without crushing the delicate seaweed sheet.
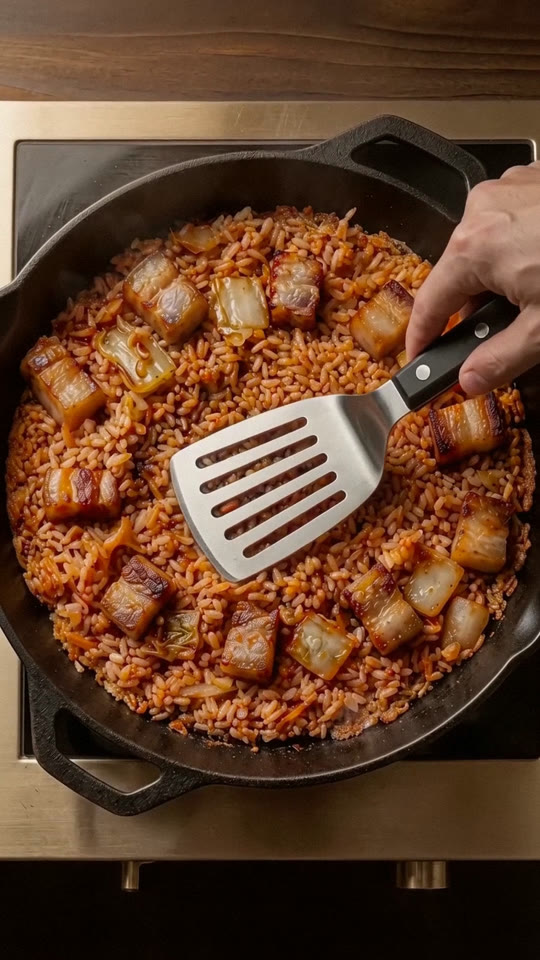
Seasoned cast iron does the heavy lifting during Step 4. Thin aluminum pans spike hot right over burner rings and cool down the instant cold rice lands inside. A heavy 12-inch cast-iron skillet stores steady radiant heat across its entire floor, toasting compressed rice starches and soy amino acids at 155°C to 175°C into an even mahogany nurungji sheet that lifts cleanly on a thin beveled slotted stainless spatula.
How do you make Cast-Iron Kimchi Fried Rice with Crispy Nurungji step by step at home?
Ingredients (2 servings)
- 450 g chilled day-old cooked short-grain rice
- 200 g well-fermented napa cabbage kimchi (chopped)
- 60 ml aged kimchi brine
- 120 g thick-cut pork belly (diced into 1 cm pieces)
- 1.5 tbsp gochujang (Korean red chili paste)
- 1 tbsp toasted sesame oil & 1 tsp soy sauce
- 15 g unsalted butter
- 2 large eggs (fried sunny-side up)
- 2 tbsp toasted sesame seeds, sliced scallions & nori strips
Method
- Render the Diced Pork Belly in Cast Iron: Cut the pork belly into bite-sized strips or 1 cm pieces, then cook in a preheated 12-inch cast-iron skillet over medium-high heat until browned, crisp at the edges, and the savory fat has rendered.
- Caramelize the Aged Kimchi: Add the chopped well-fermented napa cabbage kimchi to the skillet and stir-fry for 3 to 4 minutes in the rendered pork fat until translucent, glossy, and deeply caramelized.
- Toss Chilled Rice with Gochujang, Butter & Kimchi Brine: Add the cold day-old short-grain rice, gochujang paste, unsalted butter, soy sauce, and reserved kimchi brine, breaking up any clumps with a slotted metal spatula and tossing until every grain is evenly stained deep red.
- Press & Sear the Crispy Nurungji Crust: Spread the fried rice into an even layer and press firmly against the hot cast-iron floor with the flat back of your spatula. Drizzle toasted sesame oil around the rim and cook undisturbed over medium-low heat for 3 to 4 minutes until a golden, crackling nurungji crust forms underneath.
- Crown with a Runny Fried Egg, Sesame & Nori: Slide crispy-edged sunny-side-up fried eggs onto the center of the skillet and finish with sliced scallions, toasted sesame seeds, and snipped roasted nori strips.
What common mistakes prevent a crispy nurungji crust?
- Using warm freshly steamed rice: Warm rice traps steam and turns gummy when pressed. If you only have fresh rice, spread it thin on a sheet tray and chill it uncovered in the freezer for 15 minutes before frying.
- Stirring during the 4-minute crust sear: Moving the rice breaks the starch bond forming against the iron floor. Once you press the layer flat, leave it alone and listen for the pitch to shift from a wet hiss to a dry, nutty crackle.
- Keeping the burner on high during Step 4: Gochujang sugars scorch black above 190°C before the rice dehydrates crisp. Drop the flame to medium-low as soon as you press the rice flat.
Frequently asked questions
How sour should the kimchi be for kimchi fried rice?
Use kimchi fermented at least three to four weeks until noticeably tangy and translucent at the edges. Mild, newly opened kimchi lacks enough lactic acid to cut through pork belly fat and butter; if your jar is young, add half a teaspoon of rice vinegar to the brine.
How do I tell when the nurungji crust is ready without lifting too early?
Smell and sound give it away before you touch it. Wet sizzling quiets down into a dry popping crackle, a toasted popcorn-like aroma rises from the skillet rim, and the outer edge pulls slightly away from the seasoned iron wall so a thin beveled spatula slides underneath in one piece.
Can I make this recipe vegetarian or swap the pork belly?
Yes. Replace the pork belly with diced firm smoked tofu or king oyster mushrooms browned in two tablespoons of neutral oil plus an extra half tablespoon of unsalted butter, and check that your kimchi was fermented without shrimp paste or anchovy sauce.
How should leftover kimchi fried rice be stored and reheated?
Store cooled fried rice in an airtight container in the refrigerator for up to 3 days, frying fresh eggs at service. Reheat the rice in a lightly oiled cast-iron skillet over medium-low heat and press it flat again for 3 minutes to rebuild a fresh crunchy bottom crust.
Watch the short film
Watch our vertical short film at the top of this page, scored with the original soul-funk track Golden Under Pressure. Browse the recipe collection, send a recipe request, and follow our kitchen series on YouTube, Instagram, and TikTok.
AI-created visuals. Culinary inspiration, not a complete cooking guide.